Creating labels (label printing)
With the WSCAD SUITE, you can print inscription labels for references, cables, terminals, PLCs and measuring points on label printers from various manufacturers. You can either use predefined label settings or create your own according to your requirements. Alternatively, you can print to a file.
QR codes as labels
In addition, you can generate and print the QR codes of components in the cabinet. If the QR codes are attached to the components of the cabinet, you can use the camera of your mobile device (smartphone or tablet) with the WSCAD AR App to scan the QR code and thus have the details about the component (reference designation, function text, part number, manufacturer) displayed. To do this, some project data must be loaded via the WSCAD SUITE into a cloud storage and from there to the mobile device.
Procedure
- Defining label information
The first step is to define the label paper dimensions and the column and row arrangement for the labels and store them as your own label information. You can also select already created label information. - Creating the label template (using the Label Editor)
Assign the label information to the label template and specify the text with which the labels are to be inscribed (e.g., with the ref. name). - Creating the label settings
In the label setting, select the previously defined label information and the label template as well as the label printer. For each component (references, cables, terminals, PLCs, measuring points and QR codes), you can define your own label setting. - Printing labels
Once all default settings have been completed, you can print the labels to a printer or to a file.
Defining label information
First, define the label paper dimensions and the column and row arrangement for the labels.
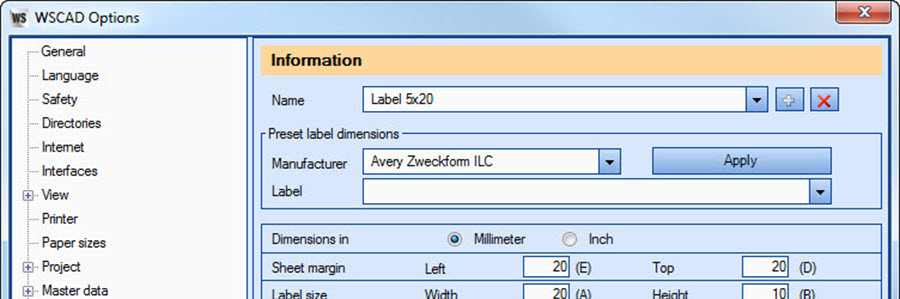
1. Click in the main menu on Tools | Settings (options) | Labels | Information.
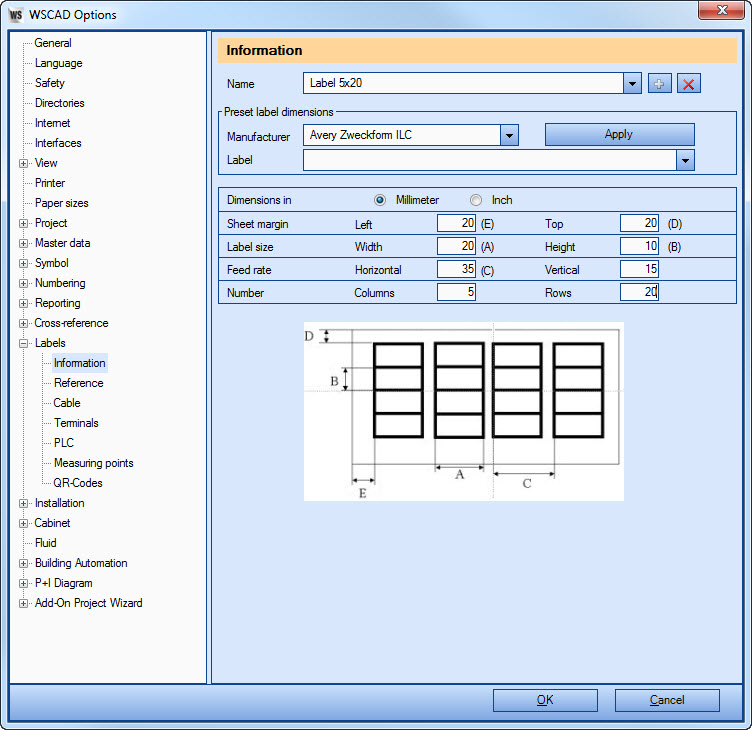
2. If you want to use predefined label information, you have the following options:
- Select a template for a common label printer from the Name drop-down list. The predefined values are transferred to the table below.
- Select one of the predefined label paper templates for different manufacturers in the Preset label dimensions area and click Apply. The predefined values are transferred to the table below.
3. If you want to define your own label information, click on the plus symbol button next to the Name drop-down list, enter a name for the label information and confirm with OK.
4. If necessary, adjust the predefined values of the table. You can set the label size in the process and specify how many rows and columns are to be included on the label paper.
5. Click OK. The entered label dimensions are stored as label information under the name specified above.
Creating a label template
Use the label editor to create a label template. Here, you define the contents of the labels using placeholders.
1. To start the Label Editor, you have the following options:
- Click in the main menu on Tools | Editors | Label.
- Click in the toolbar of the Templates Explorer on the down arrow symbol button and select the command New label from the context menu.
2. Select one of the available label information entries from the drop-down list to apply the measuring unit and the label size from the label information.

3. Click OK. The Label Editor opens. A red frame identifies the predefined label size.
4. Click on the Insert general text as text allocator symbol button to insert one or more suitable text allocators (e.g., reference name) into this frame.
Note: for QR codes use the text allocator “QR Code App”.
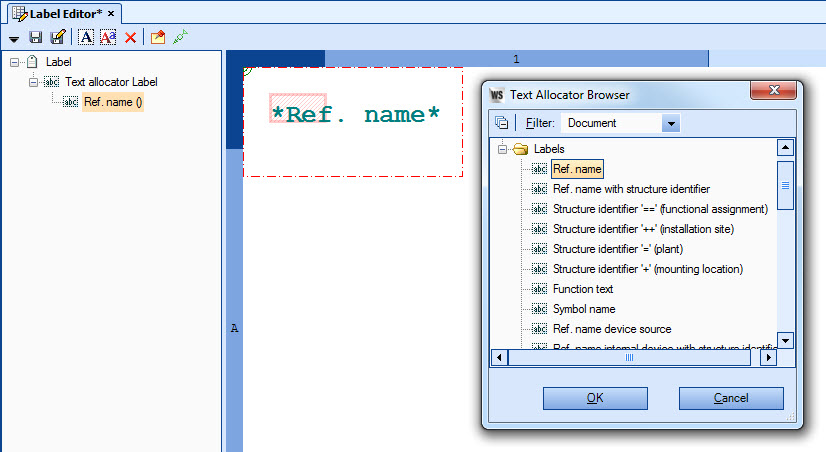
5. Save the template under <WSCAD installation directory>/Templates. The label template is displayed in the Templates Explorer.
Creating the label settings
For each element (references, cables, terminals, PLC modules, measuring points and QR codes), you can create one or more label settings. A label setting includes the label information, the label template and the type of output (printer or file).
1. Click in the main menu on Tools | Settings (options) | Labels | <Element>, e.g., Reference.
2. Click on the plus symbol button next to the Name of the label setting drop-down list, assign a name for the label setting and confirm with OK.
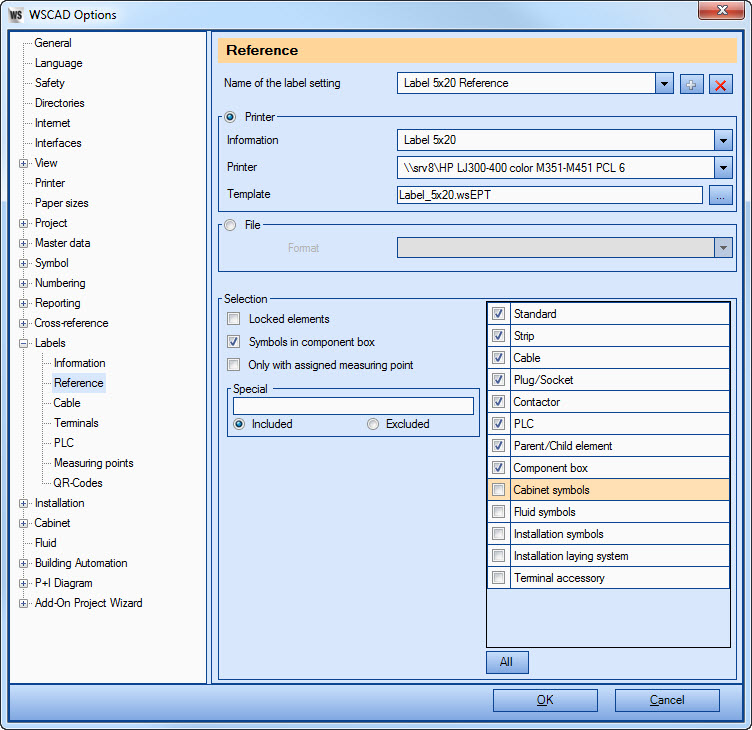
3. To print the labels on a printer, enable the Printer Select the label information entry, the label printer and the label template.
4. To print the labels to a file, you must enable the File option and select the desired file output format (e.g., Excel or Access). Label information and templates are not needed in this case.
5. In the Selection area you can extend or restrict the elements to be printed on the labels. For more information, refer to the online help.
6. Click OK.
Printing labels
After the label information, label template, and label setting have been defined, you can print the labels to a printer or to a file.
1. Click in the main menu on Report | Labels and select the desired element (e.g., Reference).
2. Select one of the label options from the Name of the label setting drop-down list.
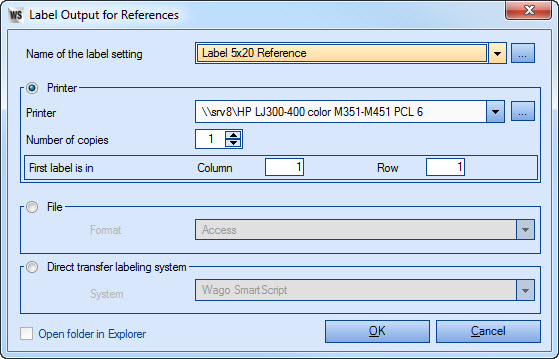
3. To print the labels on a printer, enable the Printer Select the desired printer and the number of print copies. In the Column and Row fields, you can specify the coordinates (i.e., the starting position) of the first label to be printed. This is helpful if you want to continue printing labels on a partially printed sheet of label paper.
4. To print the labels to a file, you must enable the File option and select the desired file output format (e.g., Excel or Access).
5. Click OK.

Thomas Janowicz
Technical Writer,
Documentation Management