With the WSCAD Building AR App you can create a building plan using your mobile device (tablet or smartphone) and then import it into the WSCAD schematics as a background. To do this, simply scan the rooms of the building with the camera of your mobile device and combine the rooms and floors into a plan as a DXF or PDF.
This is useful, for example, if there are no floor plans or if the rooms were not created as originally planned.
The Building AR App is compatible with the WSCAD SUITE X or higher. It can be downloaded for free from the Apple App Store for the iOS operating system. The Building AR App for the Android operating system is unfortunately not yet available, but is already being created.
More detailed information about the operation can be found in the online help of the Building AR App at:
https://www.wscad.com/HELP/English/Building_AR/index.htm
Overview
- Download and start the Building AR App
- Create/open project
- Capture room
- Add windows and doors
- Structure rooms
- View/edit plan
- Export plan
- Import plan into the WSCAD SUITE
Download and start the Building AR App
After you have downloaded the Building AR App from the Apple Store to your mobile device (tablet or smartphone), you can start the app using the “Building AR” icon.
Create/open project
First, create a new project or open an existing project. The projects are all located locally on your mobile device in the Building AR App. When a project is exported, it is also saved in the “Files” app under “Building AR”.
A project can consist of several rooms, which in turn are divided into several floors. When you create a new project, you define the project name and project description. At the same time, you define a floor and the first room.
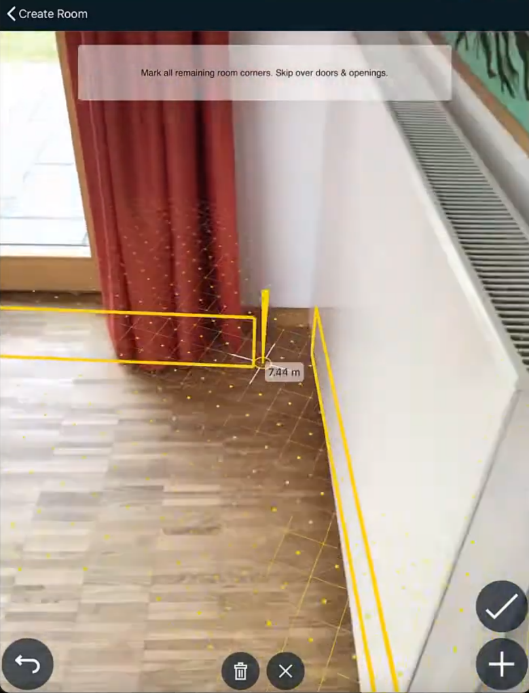
Capture room
With the camera of your mobile device, you define all corner points on the floor of the room and also a corner point on the ceiling. You have now recorded the floor area and height of the room.
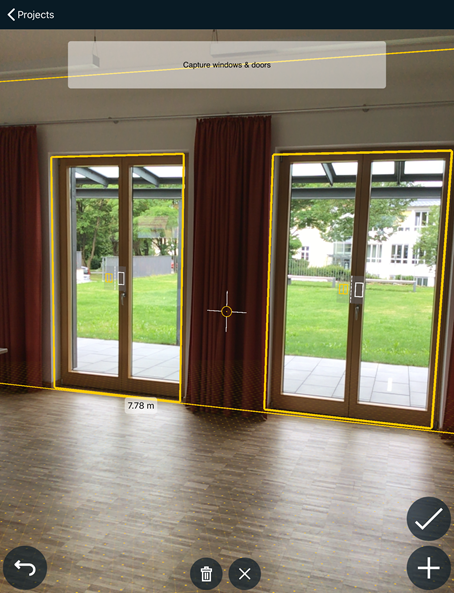
Add windows and doors
In addition, you can drag frames over the windows and doors of the room and add them to the plan.
Finally, you assign a room number for the room and, optionally, a room name and a room type.
Now you can add more rooms on the floor.
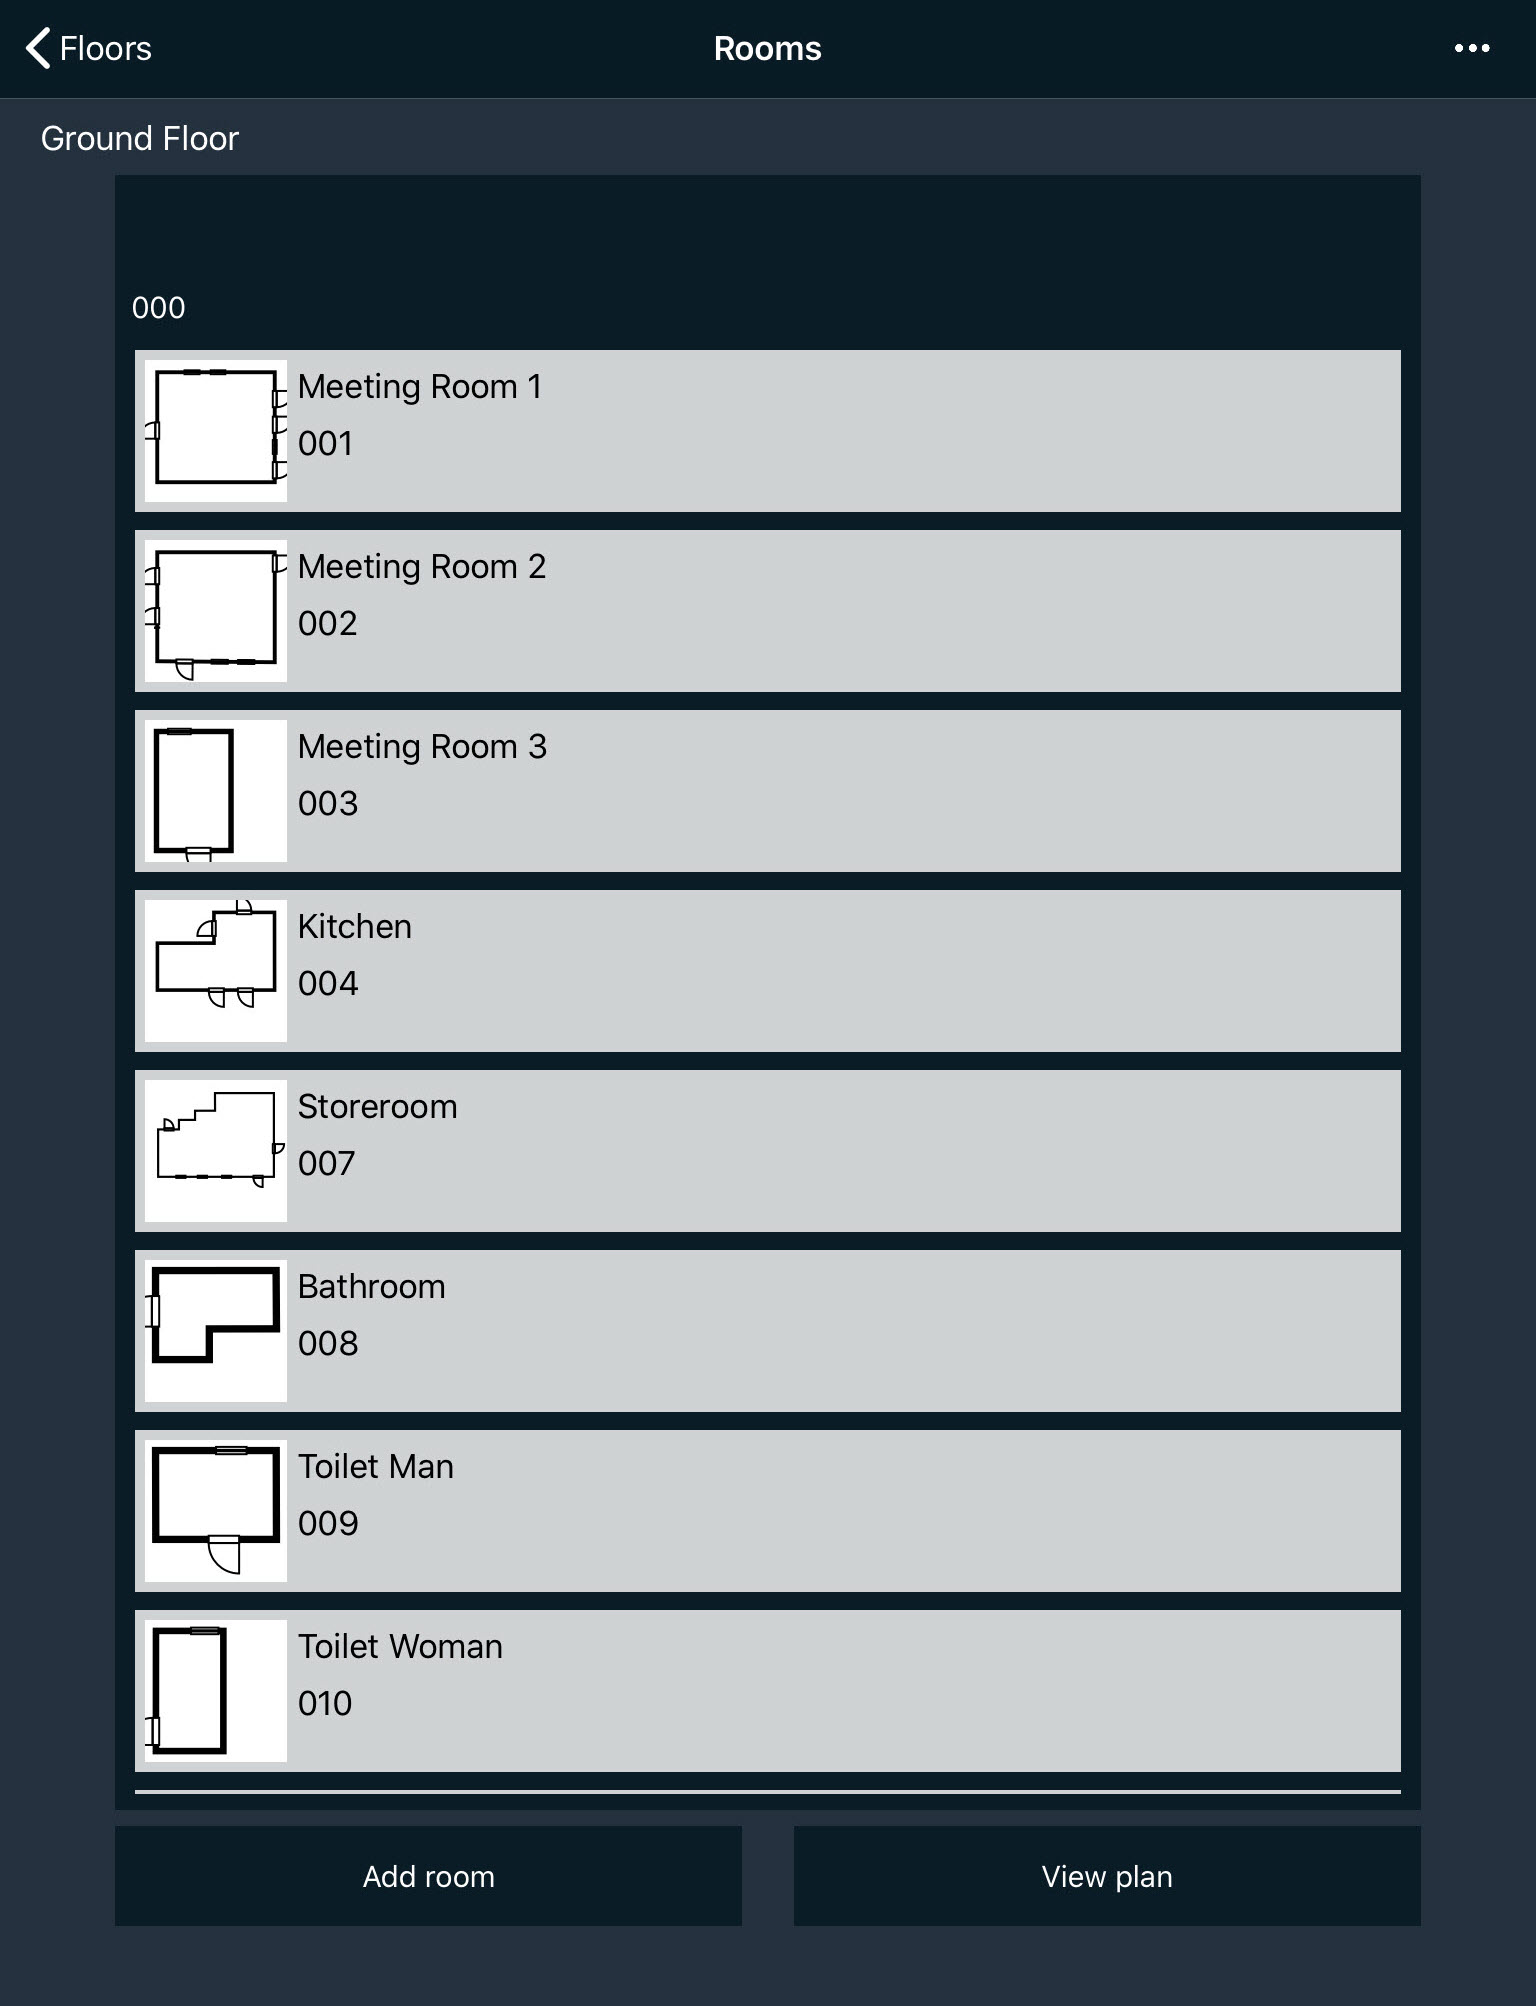
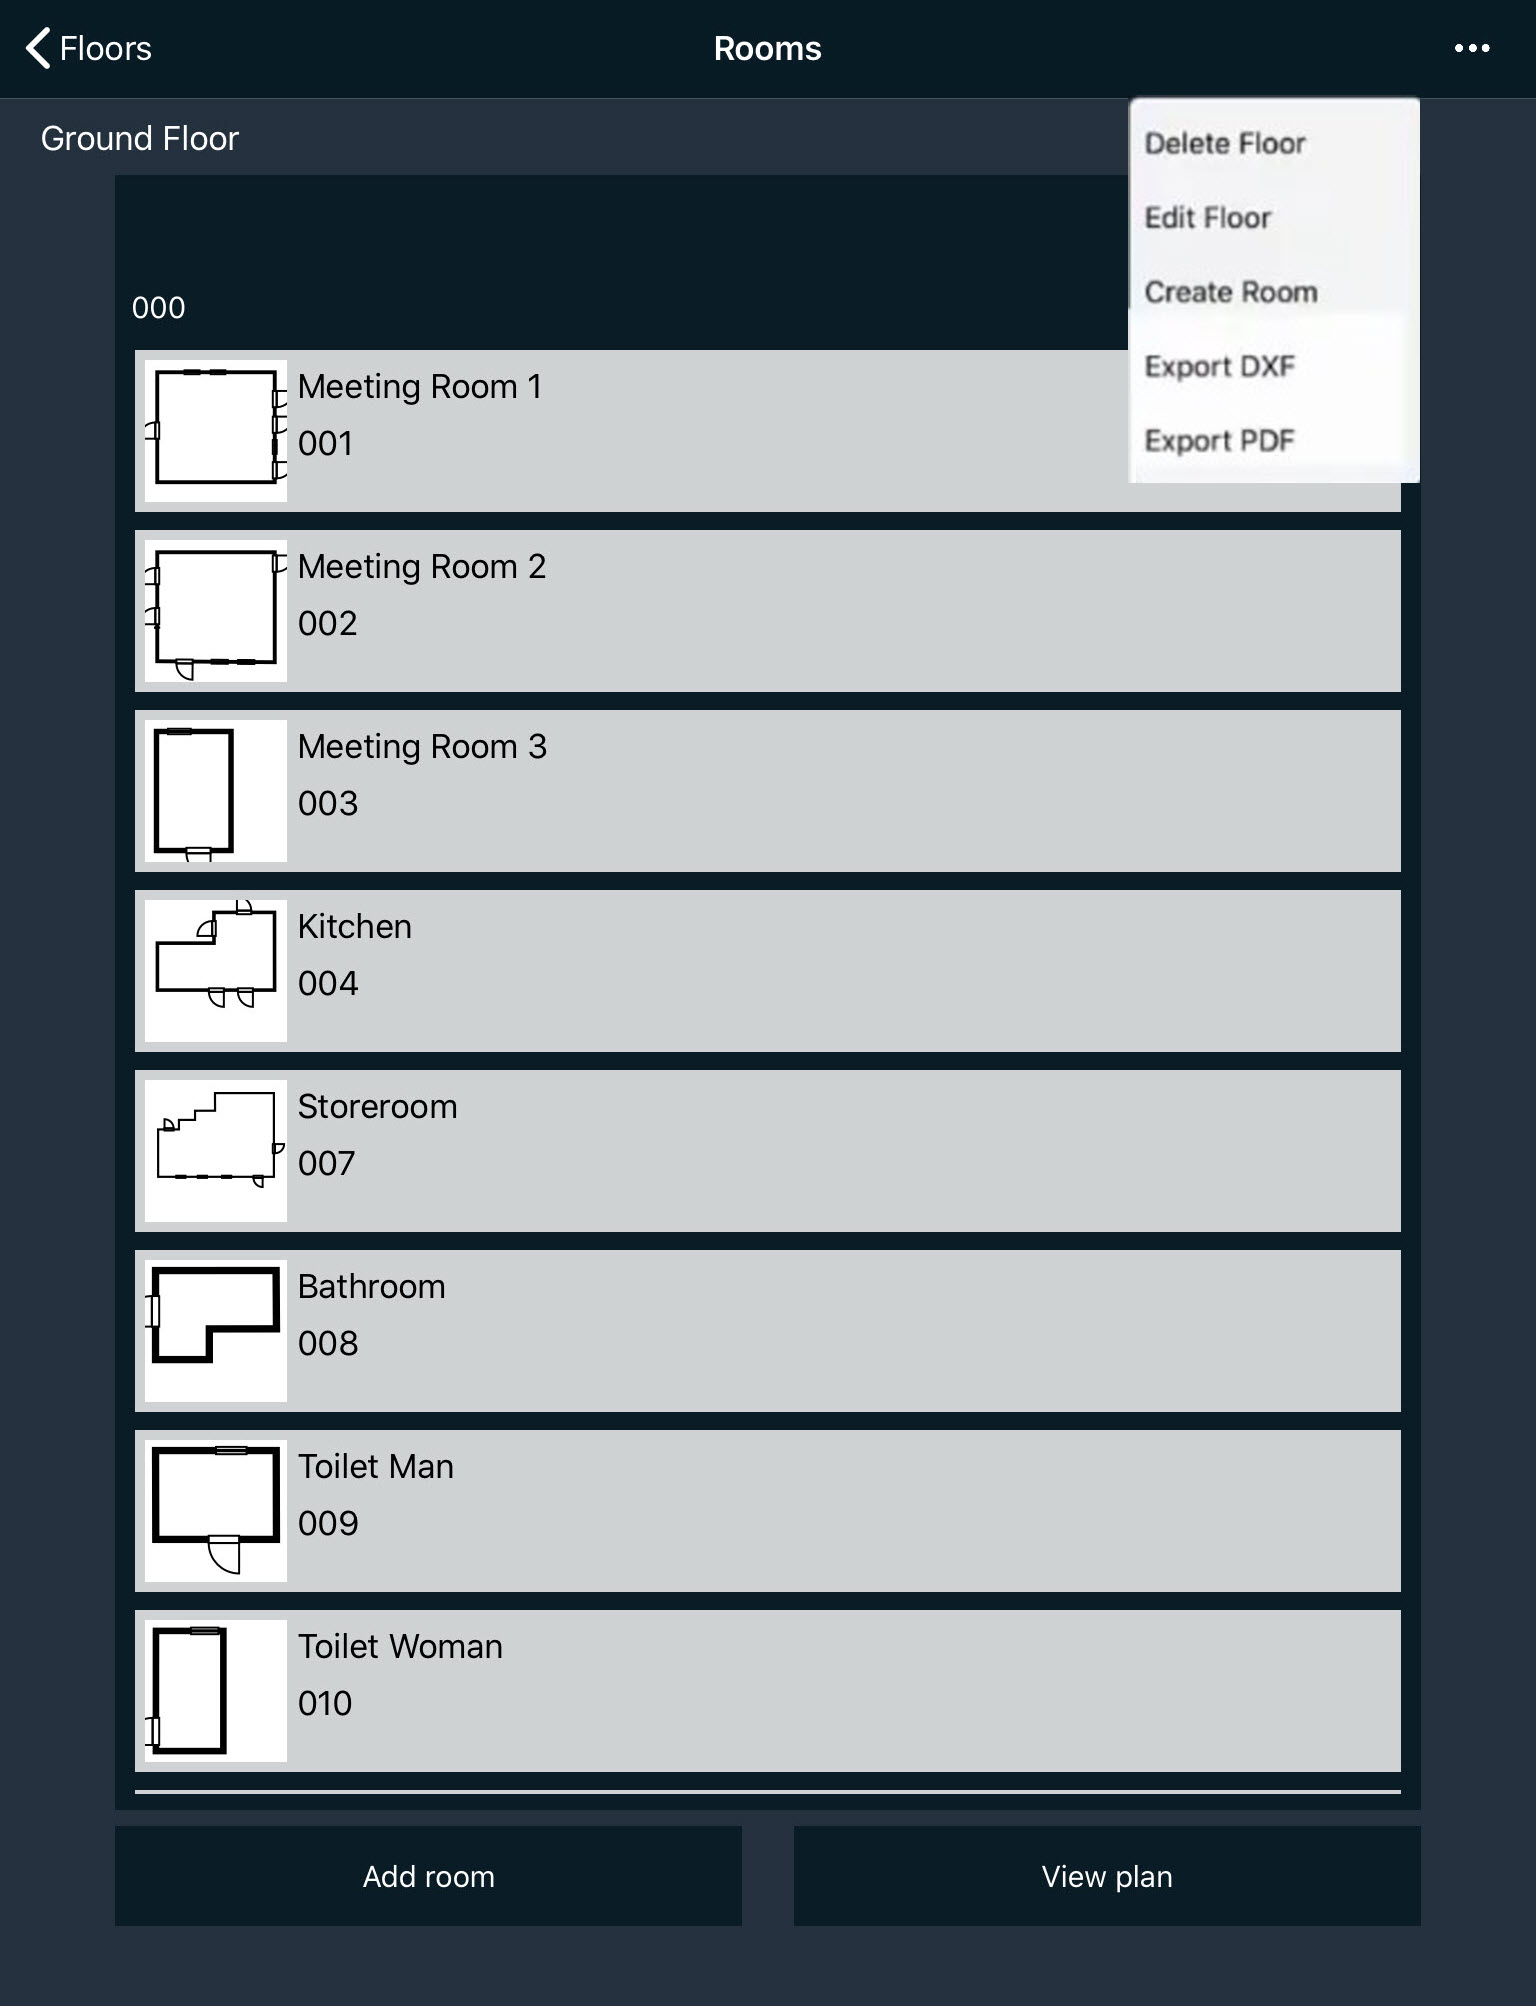
Structure rooms
The scanned rooms are combined into floors (e.g., ground floor, 1st floor, 2nd floor, …). You can add more rooms to the floors or remove them again.
By double-tapping on a room, you open it.
Edit room
You can subsequently edit the walls, windows and doors of a room. The following is possible:
- Align walls (e.g., at right angles) and move them
- Change wall length
- Move windows and doors
- Change window and door width
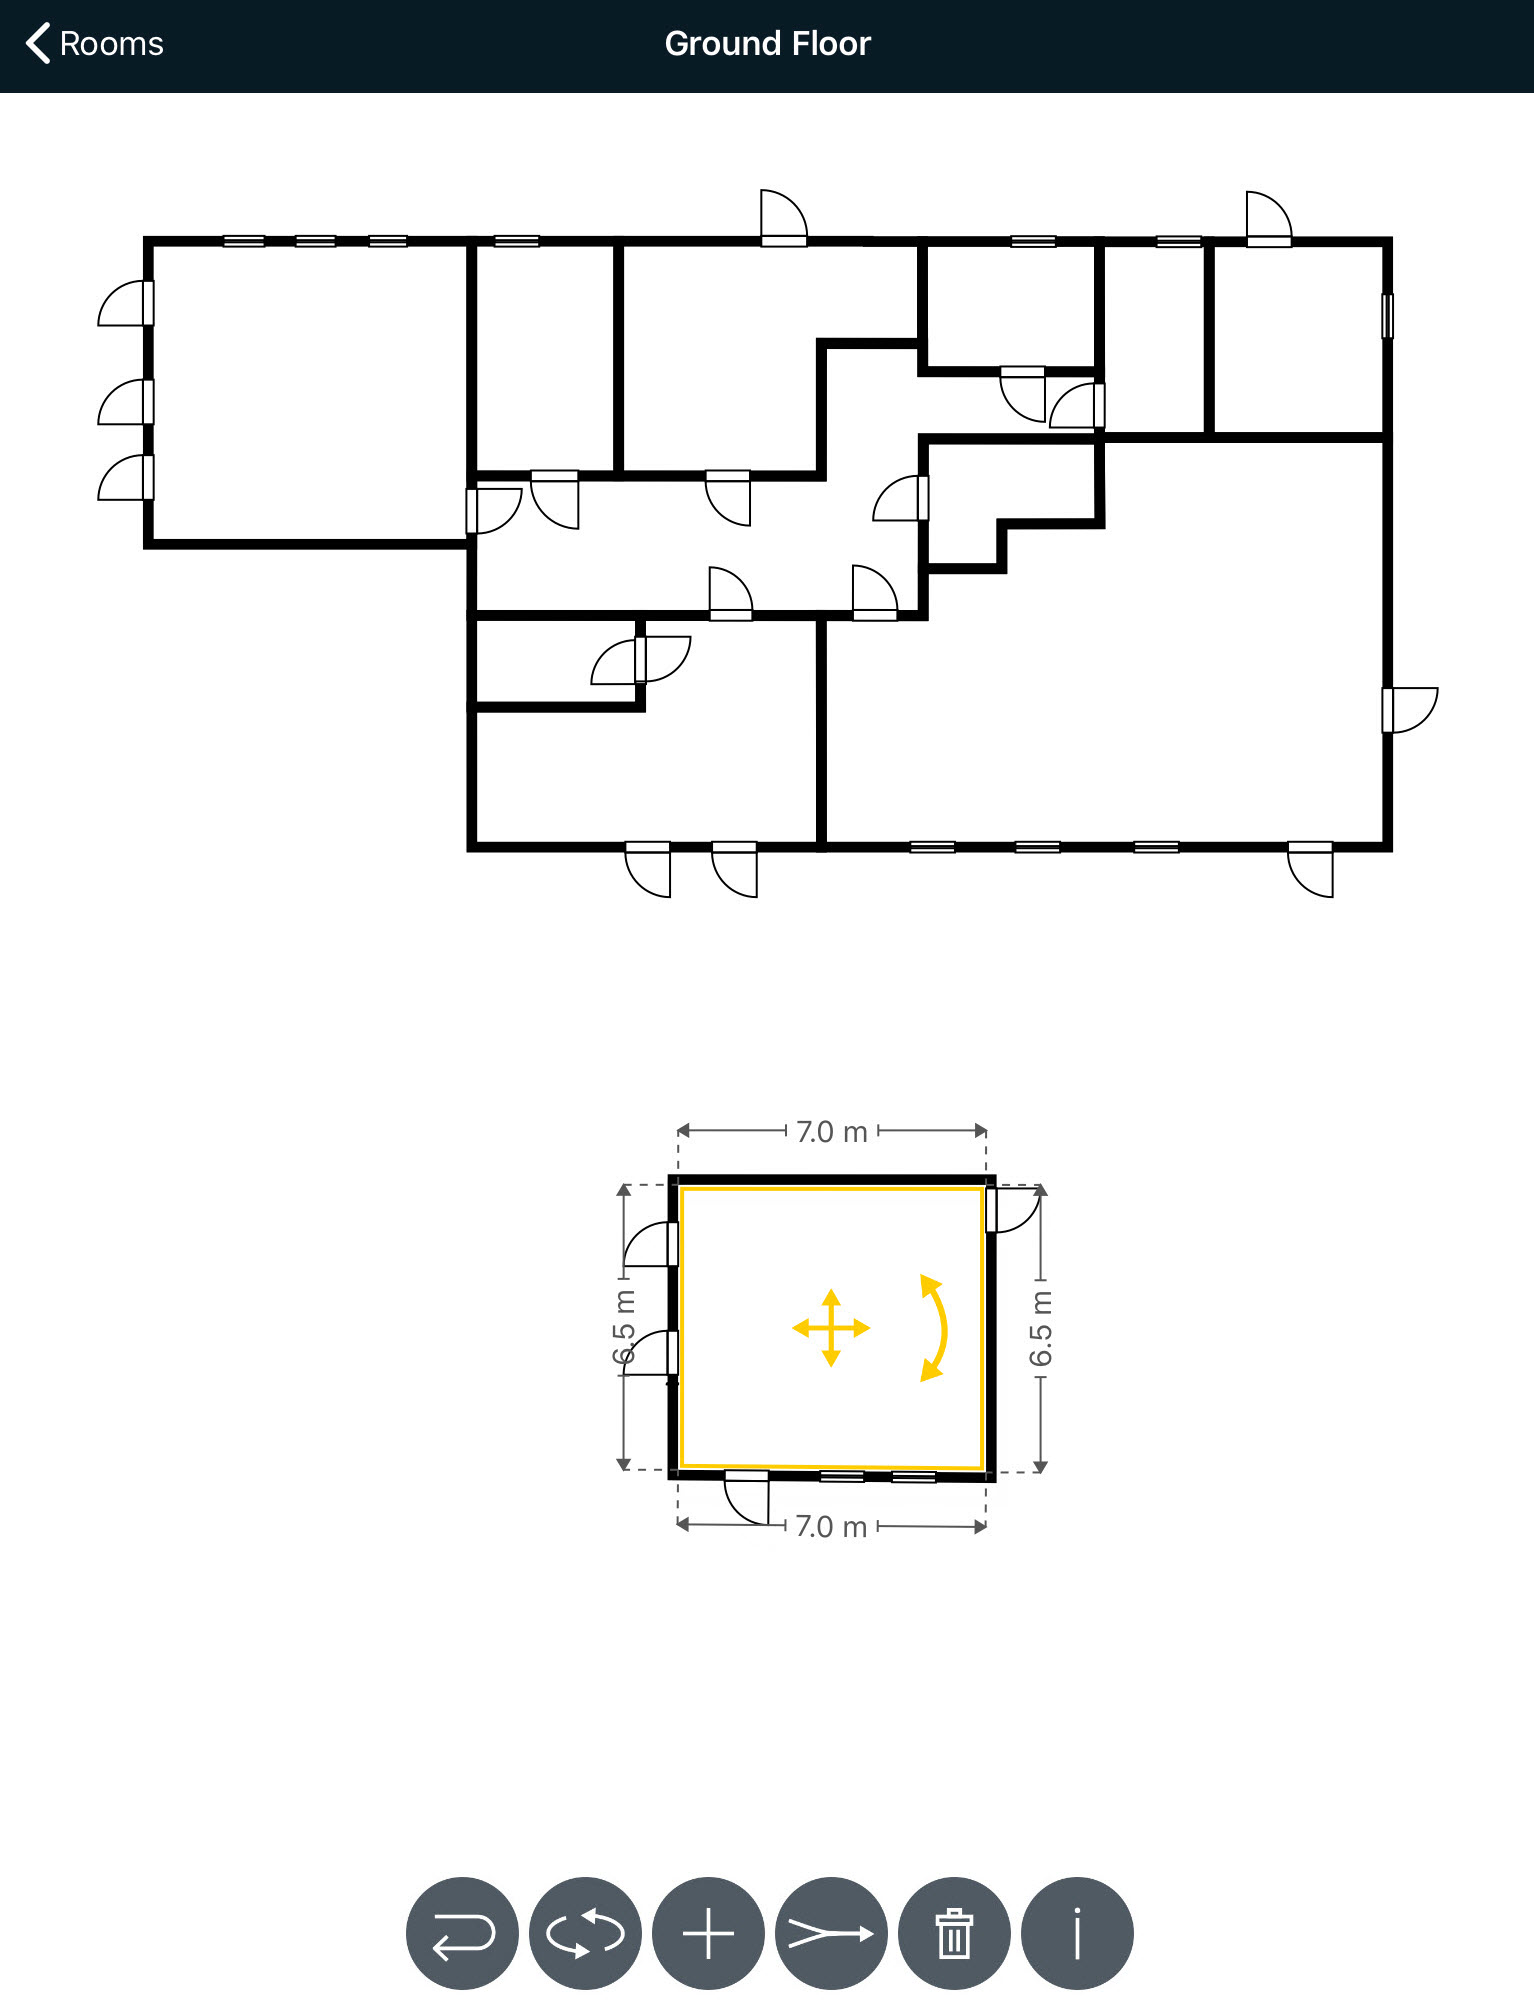
View/edit plan
For each floor, you can call up the plan with the included rooms.
![]() Using the merge symbol, you can merge several rooms into one room.
Using the merge symbol, you can merge several rooms into one room.
Using the rotate symbol, you can rotate the whole plan. ![]()
![]() Using the info symbol, you can change the preset wall thickness and the recorded room height later.
Using the info symbol, you can change the preset wall thickness and the recorded room height later.
When you tap on a room, the room dimensions are displayed. You can move the room using the yellow cross symbol and rotate it using the yellow double arrow symbol.
Using the automatic alignment function, you can position the room precisely in relation to the other rooms on the floor.
Export plan
Once all rooms and floors have been created, you can export the plan as a DXF or PDF. A separate file is created for each floor. Alternatively, you can also export a single floor.
The files are saved on your mobile device in the “Files” app under “Building AR”.
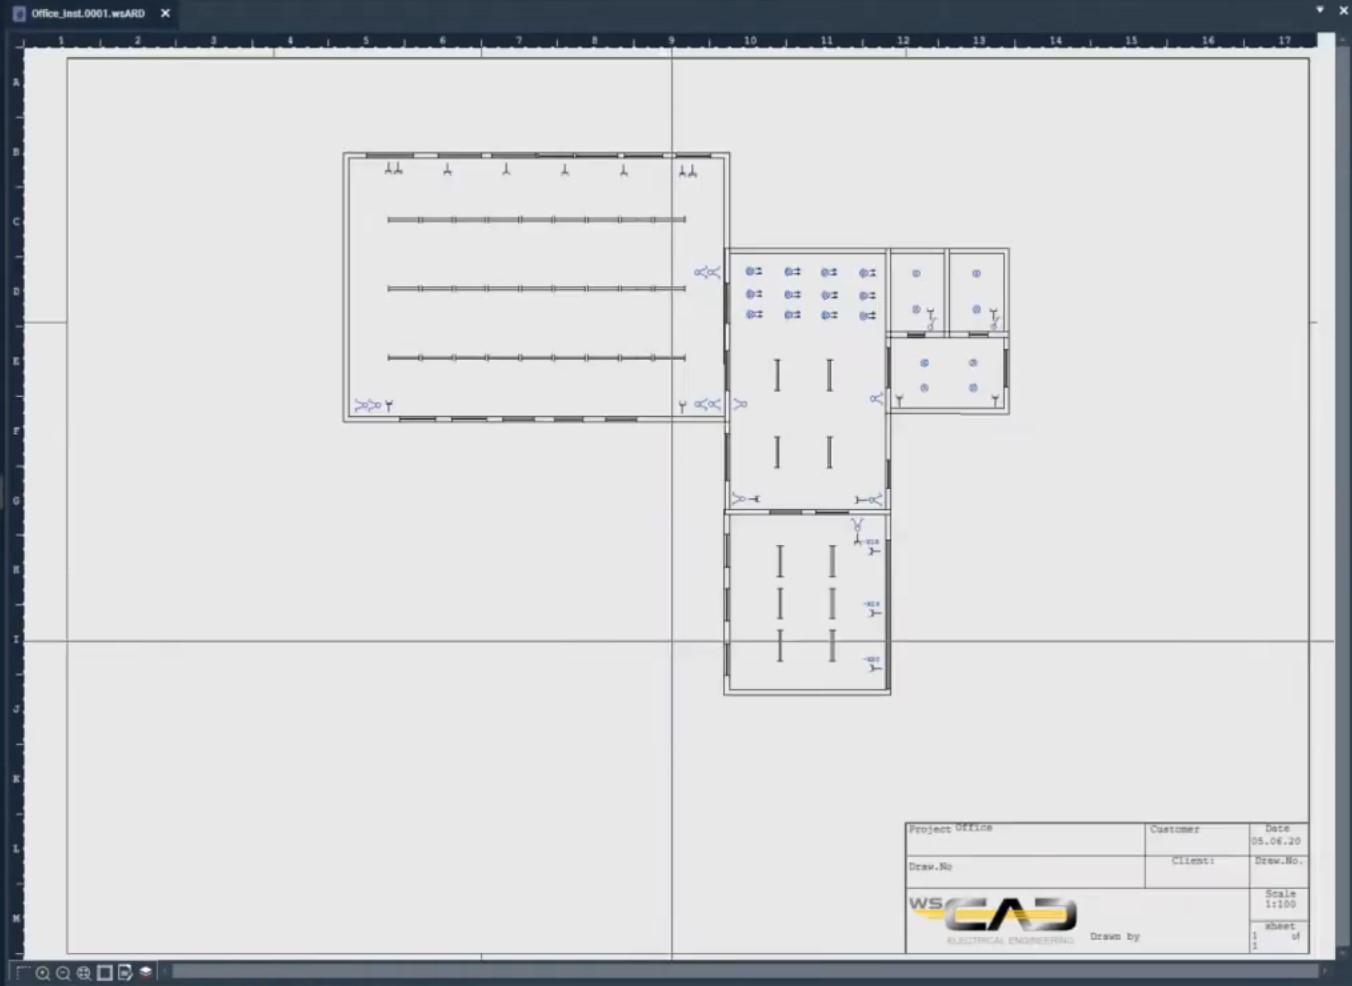
Import plan into the WSCAD SUITE
You can import individual floors or rooms as a background into the plan pages of the WSCAD SUITE.


Thomas Janowicz, Technical Writer
Documentation Management